
Tutorial
Step 9: Implementing dialogs
| This step teaches you how to implement dialogs. You will also learn how to reuse an existing PMO. |
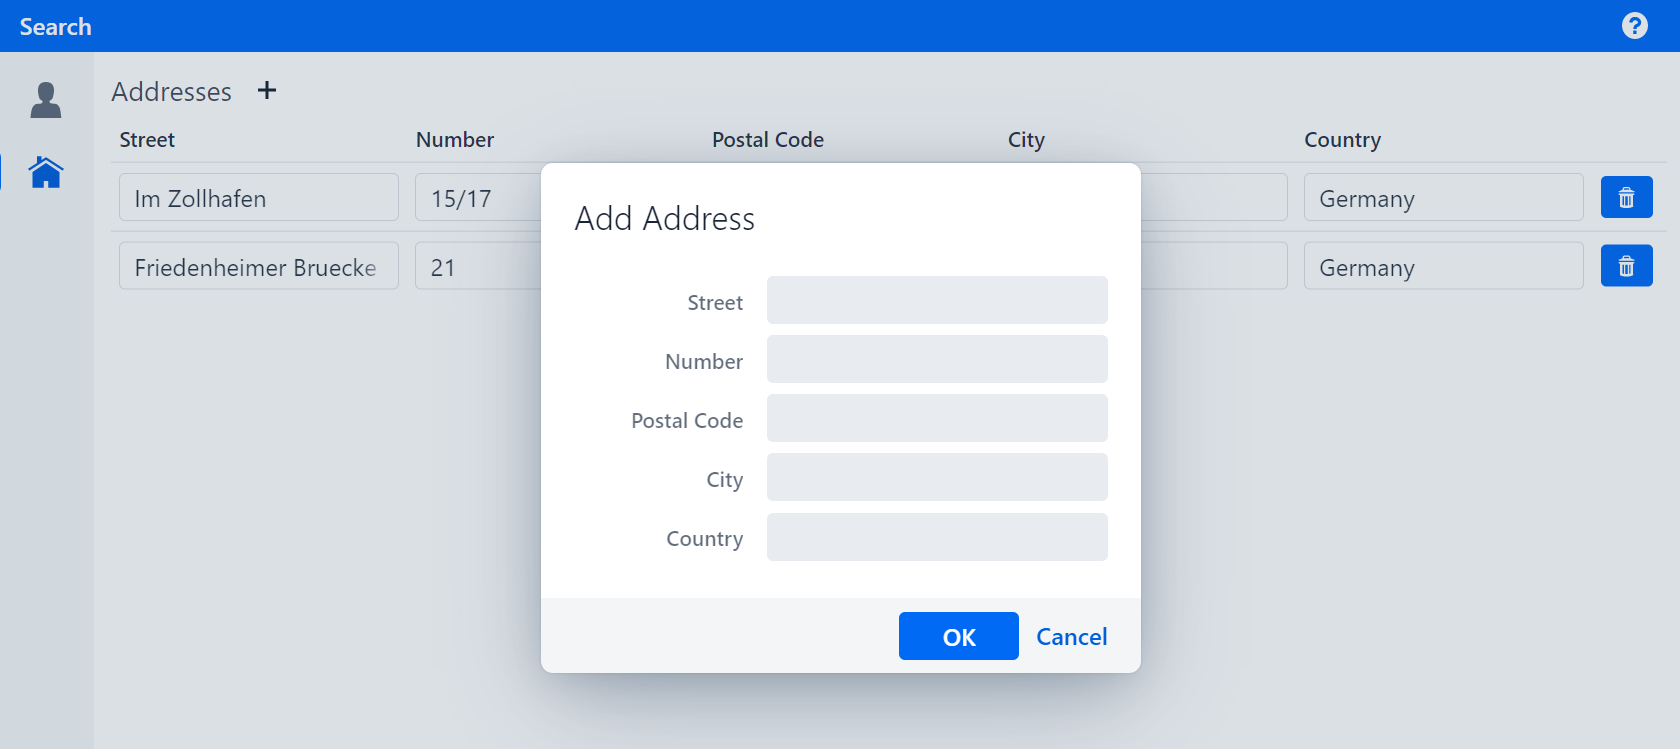
Now, we will implement the actual functionality of the add button, to add new addresses. When the user clicks on the add button, they will be prompted to enter the address data in a dialog. The entry will be added when the user finishes editing by clicking on the OK button.
Figure 1. Add Address dialog
Reusing a PMO
The content of the dialog should be the same as AddressRowPmo without the delete button.
To avoid writing the same PMO twice, reuse it as follows:
-
Extract a super class from
AddressRowPmosuch that it contains everything except the delete button and the consumer and call itAddressPmo. -
Annotate
AddressPmowith@UISectionand make sure the constructor has anAddressargument that is assigned to the fieldaddress.
The finished implementations of AddressRowPmo and AddressPmo should look like this:
AddressRowPmo.java
public class AddressRowPmo extends AddressPmo {

    private Consumer<Address> deleteConsumer;

    public AddressRowPmo(Address address, Consumer<Address> deleteConsumer) {
        super(address);
        this.deleteConsumer = deleteConsumer;
    }

    @BindReadOnlyBehavior(value = ReadOnlyBehaviorType.WRITABLE)
    @UITableColumn(width = 50)
    @UIButton(position = 60, captionType = CaptionType.NONE, showIcon = true, icon = VaadinIcon.TRASH, variants = {
            ButtonVariant.LUMO_PRIMARY, ButtonVariant.LUMO_SMALL })
    public void deleteButton() {
        deleteConsumer.accept(getAddress());
    }
}
AddressPmo.java
@UISection
public class AddressPmo {

    private final Address address;

    public AddressPmo(Address address) {
        this.address = address;
    }

    @ModelObject
    public Address getAddress() {
        return address;
    }

    @UITextField(position = 10, label = "Street", modelAttribute = "street", required = RequiredType.REQUIRED)
    public void street() {
        // model binding
    }

    @UITextField(position = 20, label = "Number", modelAttribute = "streetNumber", required = RequiredType.REQUIRED)
    public void streetNumber() {
        // model binding
    }

    @UITextField(position = 30, label = "Postal Code", modelAttribute = "postalCode", required = RequiredType.REQUIRED)
    public void postalCode() {
        // model binding
    }

    @UITextField(position = 40, label = "City", modelAttribute = "city", required = RequiredType.REQUIRED)
    public void city() {
        // model binding
    }

    @UITextField(position = 50, label = "Country", modelAttribute = "country", required = RequiredType.REQUIRED)
    public void country() {
        // model binding
    }
}
Implementing the dialog
Now, we add a new class AddAddressDialogPmo, which inherits from DialogPmo.
It wraps around our AddressPmo and provides dialog functionalities such as validation, method invocation when OK is pressed and setting a dialogs caption.
Implement it as follows:
-
Add a constructor with parameter
Consumer<Address> saveAddressand store the value in a field. -
Create a new field of type
AddressPmoand call itcontentPmo. -
In the constructor, create a new
Addressand use it to create a newAddressPmo, which is stored incontentPmo. -
Override the method
getCaptionand return "Add Address". -
Override
getOkHandlerand return a lambda function without input parameters and callingsaveAddress#accepton thecontentPmo´s address. -
Override
getContentPmoand returncontentPmo.
The finished implementations of AddAddressDialogPmo should look like this:
AddAddressDialogPmo.java
public class AddAddressDialogPmo implements DialogPmo {

    private final Consumer<Address> saveAddress;
    private final AddressPmo contentPmo;

    public AddAddressDialogPmo(Consumer<Address> saveAddress) {
        this.saveAddress = saveAddress;
        contentPmo = new AddressPmo(new Address());
    }

    @Override
    public String getCaption() {
        return "Add Address";
    }

    @Override
    public Handler getOkHandler() {
        return () -> saveAddress.accept(contentPmo.getAddress());
    }

    @Override
    public AddressPmo getContentPmo() {
        return contentPmo;
    }
}
Now, switch to the AddressPage.
-
Create a new method
addAddresswith an input parameteraddressof typeAddress. -
Add the
addressto thepartner. -
Save the changed
partnerin thepartnerRepository. -
In
createContentaddthis::addAddressto the input parameters ofAddressTablePmo
The finished implementation should look like this:
AddressPage.java
@Override
public void createContent() {
    addSection(new AddressTablePmo(partner::getAddresses, this::deleteAddress, this::addAddress));
}

public void addAddress(Address address) {
    partner.addAddress(address);
    partnerRepository.saveBusinessPartner(partner);
}
Finally, switch to AddressTablePmo to create the button that opens the dialog.
-
Add a new constructor parameter
createConsumerof typeConsumer<Address>and assign it to a new field. -
Rename the
addmethod togetAddAddressDialogPmoand let it return an element of typeDialogPmo.-
Return a new instance of
AddAddressDialogPmousing thecreateConsumer. -
Delete the
@UIButtonannotation. -
Annotate the method with
BindIcon(VaadinIcon.PLUS). -
Annotate the method with
@UIOpenDialogButtonsetting the position to 10 and usingCaptionType.NONE.
-
There are alternatives for opening a Dialog.
However, using @UIOpenDialogButton is the preferred way for creating dialogs on button press.
|
AddressTablePmo.java
private final Consumer<Address> createConsumer;

public AddressTablePmo(Supplier<List<? extends Address>> modelObjectsSupplier, Consumer<Address> deleteAddress,
        Consumer<Address> createConsumer) {
    super(modelObjectsSupplier);
    this.deleteAddress = deleteAddress;
    this.createConsumer = createConsumer;
}

@SectionHeader
@BindIcon(VaadinIcon.PLUS)
@UIOpenDialogButton(position = 10, captionType = CaptionType.NONE)
public DialogPmo getAddAddressDialogPmo() {
    return new AddAddressDialogPmo(createConsumer);
}
If you run your application and click on the add button, you should see a dialog with the same fields as the address table. If you click on the button "OK", you should now see a new address in the table with the information provided in the dialog.
Figure 2. Add Address dialog
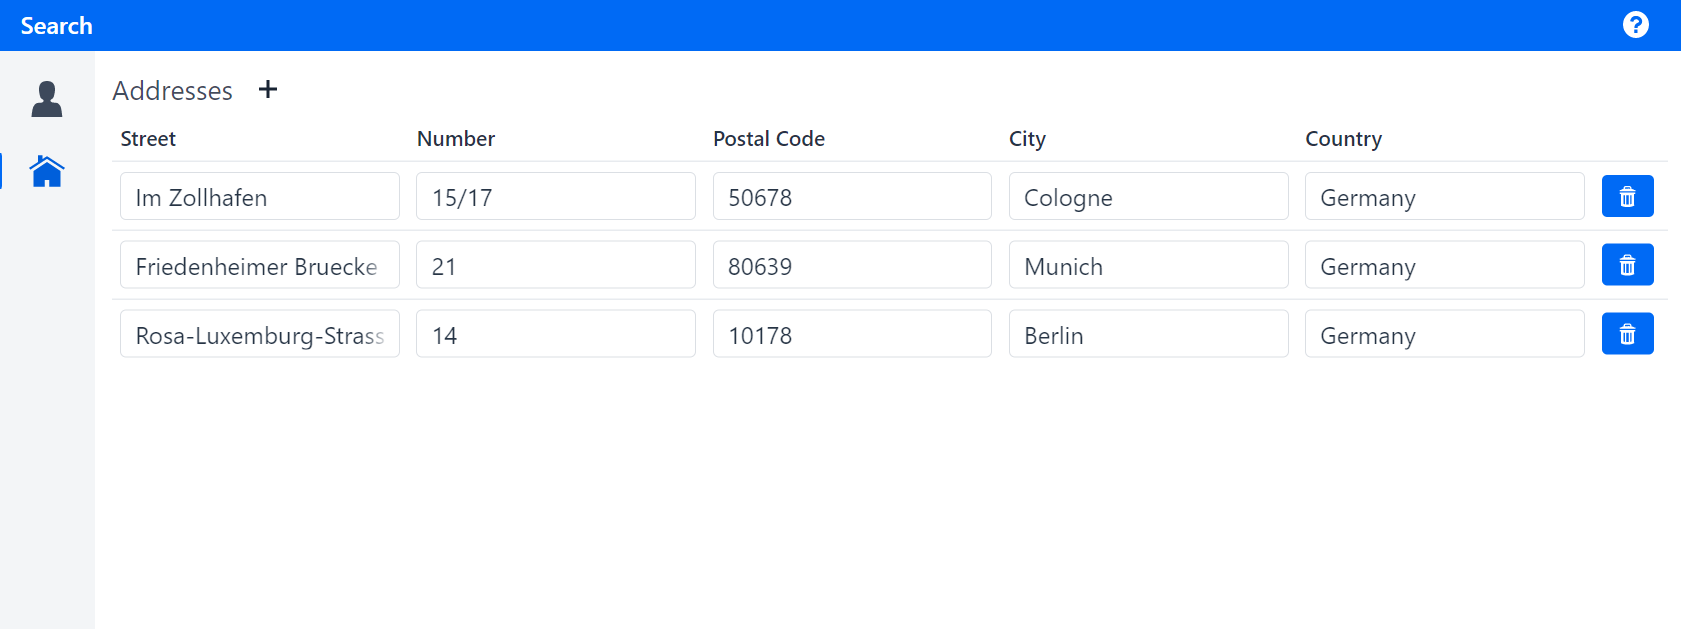
Figure 3. New Address added
The next step extends the UI such that an address cannot be added if a field is empty.